
I spent ages looking for a pattern for spirals in squares, and could not find one I liked, so I followed the instructions to make a spiral here. I then figured out how to turn various sized spirals into squares, so that I can make a blanket with fading spirals.

So here are the patterns for all 4 squares. To see detailed pictures on how to start the spirals, please follow the link above to the Snovej blog.
Abreviations
MR – Magic Ring
CH – Chain
SC – Single Crochet
HDC – Half Double Crochet
DC – Double Crochet
ST(S) – Stitch(es)
SL ST – Slip Stitch
FO – Fasten Off
Notes
I am using US crochet terms.
Yarn used is Jarol/Woolcraft Heritage (lovely to work with).
4mm crochet hook.
Total number of stitches around the outside of the spiral will be put in [square brackets] at the end of each round, total number of stitches made that round will be put in <these arrows> at the end of each round.
Large Spiral Square

With yarn A make a MR, CH1, 1SC, 1HDC, 2DC, pull up a long loop so it doesn’t unravel when you’re working with the next yarn.
Change to yarn B, and work the same in the MR: CH1, 1SC, 1HDC, 2DC, pull up a long loop.
Change to yarn C, and work the same in the MR: CH1, 1SC, 1HDC, 2DC, pull up a long loop. [12] <12>
Pull the MR tight, then begin working with yarn A again. In the next colour: 2DC in the next 4 STS.
Repeat with the other 2 colours. [24] <24>
Return to yarn A: *1DC in next, 2DC in next ST* repeat 4 times.
Repeat with the other 2 colours. [36] <36>
Return to yarn A: *1DC in next 2 STS, 2DC in next ST* repeat 4 times.
Repeat with the other 2 colours. [48] <48>
Return to yarn A: 3HDC, 3SC, Sl ST, FO
Repeat with the other 2 colours. [48] <21>
Join yarn D (border colour) to any stitch and CH4 (counts as 1DC, CH1), 1DC in same ST, *1DC in next, 2HDC, 5SC, 2HDC, 1DC, (1DC, CH1, 1DC) in next* repeat from * around. [52] <52>
SL ST into corner space, CH3, (1DC, CH1, 2DC) in same space, *DC in each ST to next corner space (2DC, CH1, 2DC) in same space* repeat from * around, FO. Weave in ends. [68] <68>
Medium Spiral Square
With yarn A make a MR, CH1, 1SC, 1HDC, 2DC, pull up a long loop so it doesn’t unravel when you’re working with the next yarn.
Change to yarn B, and work the same in the MR: CH1, 1SC, 1HDC, 2DC, pull up a long loop.
Change to yarn C, and work the same in the MR: CH1, 1SC, 1HDC, 2DC, pull up a long loop. [12] <12>
Pull the MR tight, then begin working with yarn A again. In the next colour: 2DC in the next 4 STS.
Repeat with the other 2 colours. [24] <24>
Return to yarn A: *1DC in next, 2DC in next ST* repeat 4 times.
Repeat with the other 2 colours. [36] <36>
Return to yarn A: 2HDC, 2SC, SL ST, FO.
Repeat with the other 2 colours. [36] <15>
Join yarn D (border colour) to any stitch and CH4 (counts as 1DC, CH1), 1DC in same space, *1HDC, 6SC, 1HDC, (1DC, CH1, 1DC) in next space* repeat from * around. [40] <40>
SL ST into corner space, (CH3,1DC, CH1, 2DC) in same space, *DC in each ST to next corner space, (2DC, CH1, 2DC) in corner space* repeat from * around. [56] <56>
SL ST into corner space, (CH3,1DC, CH1, 2DC) in same space, *DC in each ST to next corner space, (2DC, CH1, 2DC) in corner space* repeat from * around. [72] <72>
Small Spiral Square

With yarn A make a MR, CH1, 1SC, 1HDC, 2DC, pull up a long loop so it doesn’t unravel when you’re working with the next yarn.
Change to yarn B, and work the same in the MR: CH1, 1SC, 1HDC, 2DC, pull up a long loop.
Change to yarn C, and work the same in the MR: CH1, 1SC, 1HDC, 2DC, pull up a long loop. [12] <12>
Pull the MR tight, then begin working with yarn A again. In the next colour: 2DC in the next 4 STS.
Repeat with the other 2 colours. [24] <24>
Return to yarn A: 1HDC, 1SC, SL ST, FO.
Repeat with other 2 colours. [24] <9>
Join yarn D (border colour) to any stitch and CH4 (counts as 1DC, CH1), 1DC in same space, *5SC, (1DC, CH1, 1DC) in next space* repeat from * around. [28] <28>
SL ST into corner space, CH4 (counts as 1DC, CH1), 1DC in same space, *DC in each ST to next corner space, (1D, CH1, 1DC) in space* repeat from * around. [36] <36>
SL ST into corner space, (CH3, 1DC, CH1, 2DC) in space, *DC to next corner space, (2DC, CH1, 2DC) in space* repeat from * around. [52] <52>
SL ST into corner space, (CH3, 1DC, CH1, 2DC) in space, *DC to next corner space, (2DC, CH1, 2DC) in space* repeat from * around. [68] <68>
Blank Square

With yarn D: In MR – CH3 (counts as first DC), 11DC, join to top of CH3. [12]
CH3, 2DC in each ST around, join to top of CH3. [24]
CH3, *2DC in next, 1DC* around, join to top of CH3. [36]
CH4 (counts as 1DC, CH1), 1DC in same space, *1HDC, 6SC, 1HDC, (1DC, CH1, 1DC) in next space* repeat from * around. [40]
SL ST into corner space, (CH3, 1DC, CH1, 2DC) in space, *DC in each stitch to next corner space, (2DC, CH1, 2DC) in space* repeat from * around. [56]
SL ST into corner space, (CH3, 1DC, CH1, 2DC) in space, *DC in each stitch to next corner space, (2DC, CH1, 2DC) in space* repeat from * around. [72]
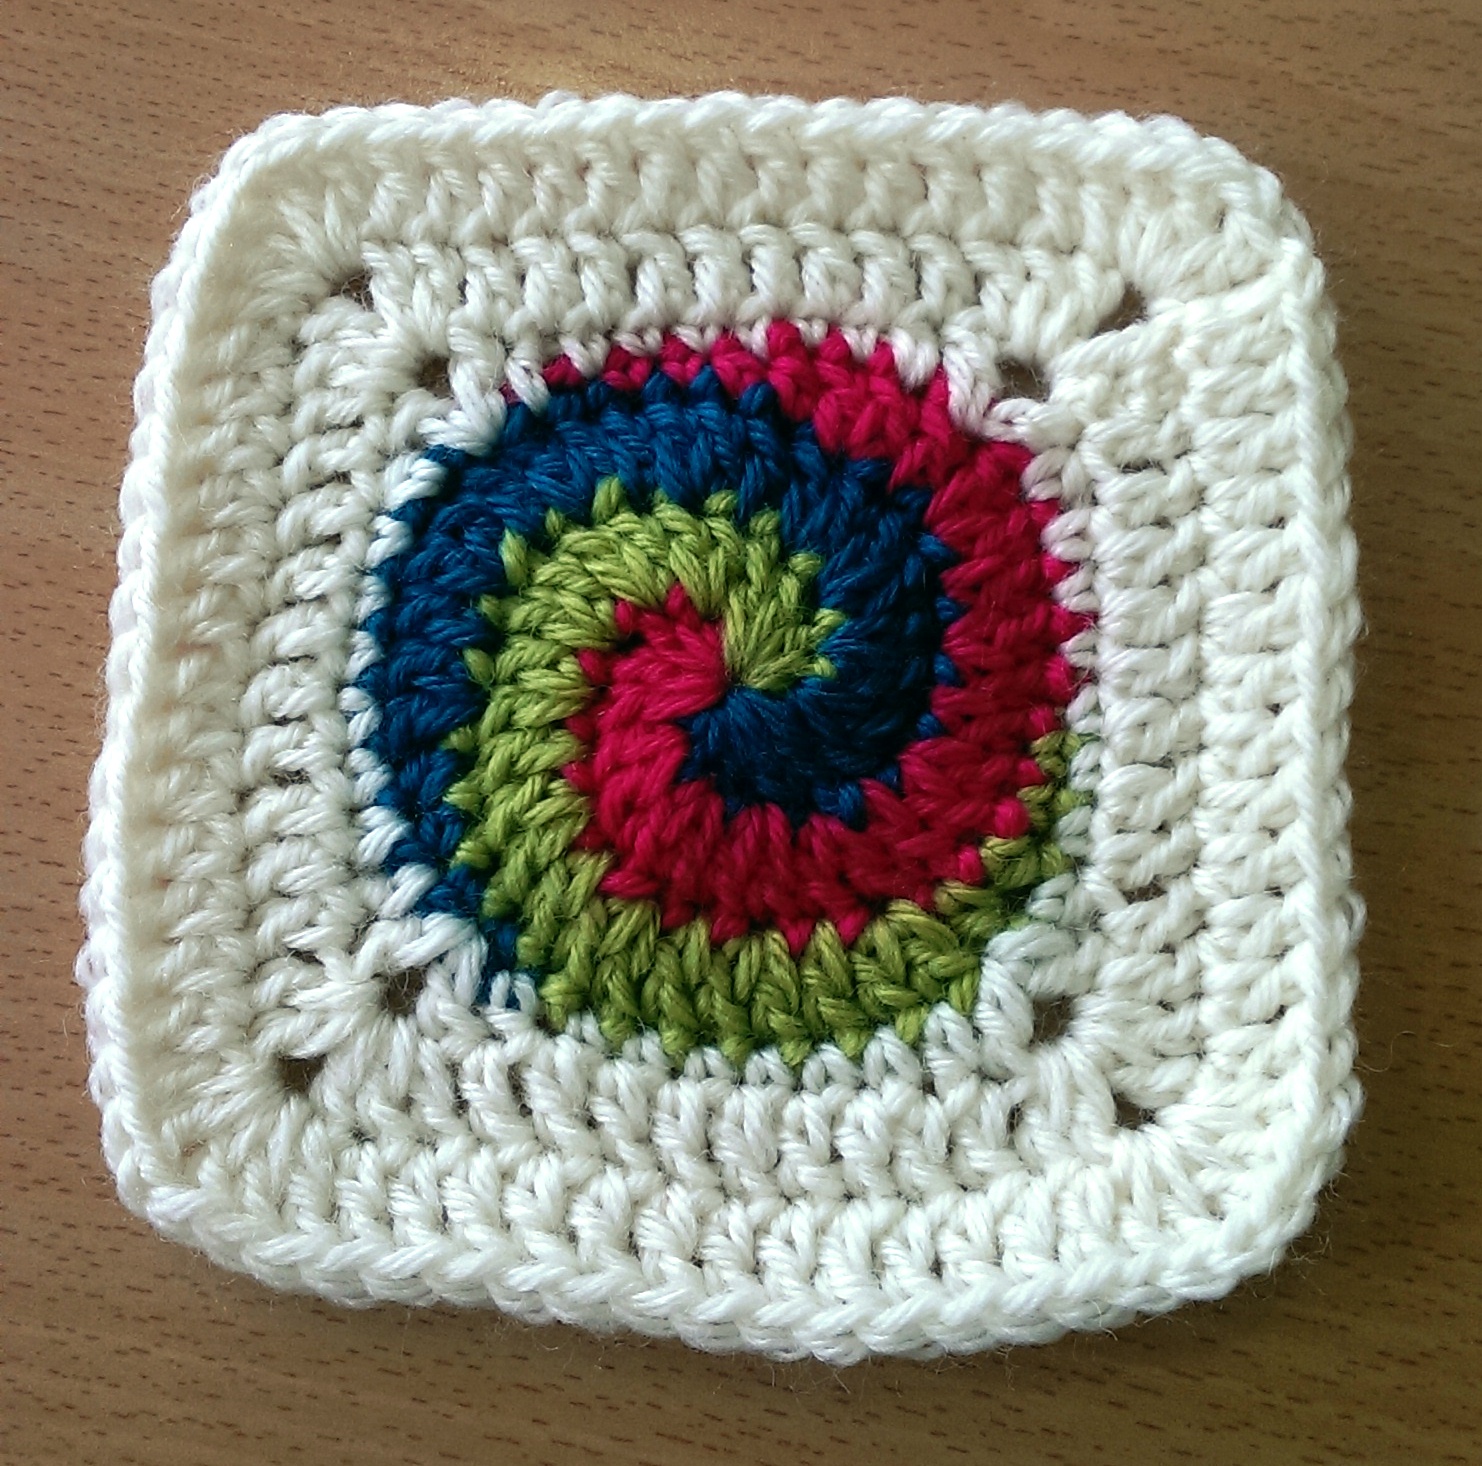
I haven’t finished messing around with these yet. I think I’m going to make a blanket with spirals fading from bottom to top. These are my squares so far:
I will take some more (better) pictures when it’s done, but I hope this has been useful to you. If you see any errors in the pattern, or if you want me to clarify anything, please let me know.
You may use the pattern freely, and sell items made from the pattern, I only ask that where possible, you credit me.
Thanks for reading! 🙂

Beautiful. The spirals look like pinwheels!
Gorgeous, Straight onto my to do list!
I am so excited to do these. Spiral and then a square I love it and want to learn to say I can ! Thank you Beautiful for a Mat in my Kitchen.
My opinion would be to start with a blank moving up to full, and then have it decrease from then. But what you have is beautiful as it is. I may have to do one of these for my daughter and me. Thanks for the pattern!!
where and how do I print these wonderful spirals……??????
I JUST CAN’T SEEM TO FIND A “PRINT” BUTTON ON ANY LINK….. PLEASE DIRECT ME….
THANKS SOOOO MUCH… BARBARA
On your web browser you should be able to print the page. Either by going File > Print, or Menu > Print. I hope this helps.
J adore j ai commence une petite couverture je pense qye les carres deja fait vont servir pour un cousdin et m inspirer de ses spirales
Merci c est tres joli
Sylviane
I am totally impressed with the work you’ve done. I like the sequence as well as the colors. Thanks for your efforts. It helps us all.
Thanks very much!
wow! I’ve been looking forever! Thank you. Do you have any suggestions on how to make a square out of any size circle? My gf and I are making a friendship blanket. Each of our squares are larger than this. Any suggestions you have are helpful! Thanks!
All I can say it trial and error! That’s how I worked this pattern out. You generally need to make longer stitches in the corner to straighten out the sides.
Love you this pattern. Is this pattern turned to WS and RS? Is the yarn carried or is the yarn just picked up? TIA.
It’s all worked on WS, no turning. You just pick up the next colour when you get to it.
THIS is fantastic and a great way to use scraps, every last little piece, nothing wasted, I like that. Also a very neat way of fading the sizes of the spirals, very artistic.
inspirujący tutorial.Dziękuję.
Thank you for this pattern! I was looking for a pattern of `just a circle in a granny´, but this one is so much more original! I´m just wondering; the big and the small spiral end with 68 stitches, the medium and blank circle end with 72 stitches. When you join the grannys, how do you deal with the remained 4 stitches?
I honestly can’t remember, I think I just skipped a couple of stitches in the corner when joining!
Thank you for instructions. This caught my eye, love the spirals!